Oh, hey there.
So I have been making this recipe for Baba Ghanouj at home and for friends for the past few months and have heard nothing but great things about it. Of course, I want to give the original recipe credit. It can be found here, but keep in mind that, on this blog, I've shown a slightly modified version of it.
What's that? What's Baba Ghanouj, you say? Oh! It's essentially eggplant trying to imitate hummus. It's roasted eggplant pureed into a similar texture to hummus and used for the exact same thing. Dipping and enjoying goodness!
That being said. This will go quickly so get ready!
I should start off by saying that you really should have a food processor for this. If you don't, you MAY be able to get away with it using a blender or an emulsion blender. I have a NINJA and I'm in love with it.
Alright, here are the ingredients:
2 medium-large eggplants (about 1 pound each)
3-4 cloves of garlic, minced
1/3-1/2 cup of tahini (sesame seed paste)
1/3 cup good olive oil
1/4 cup lemon juice
salt and pepper to taste
Ok, so you need to set your oven to 375, oil your baking sheet, cut the tops off your eggplants and then slice them in half longways. You are going to lay them, cut side down, on the baking sheet and bake them until the flesh is super tender (this can take you anywhere from 45 minutes to an hour plus).
**I usually figure out they are done by looking at how wrinkled the skin looks and poking it, but I'm gutsy and like sticking my hands in hot ovens :-)**
You are next going to transfer the eggplant to a cooling rack so they can drain. Eggplants carry A LOT of fluid that you just don't want to take away from the taste of the vegetable. They will drip/drain/cool for about half an hour and then you can scoop out the flesh into the food processor where you have oh, so preparedly placed all the other ingredients.
Like this!
Then you are literally just going to blend the heck out of it until it is the consistency you want. Here is the trick to this: if you are making this, you've had it before at restaurants and know what it should taste like. If it needs more tahini, DO IT. Salt? DO IT. More garlic? Oh, HECK yes. Please do not be afraid to make this suitable for your tastes. I NEVER make it the same way. This recipe is general and is designed to adjust. I always end up adding more salt or garlic or lemon juice. If it's too thick, add more oil. There you go, you got it now!
Alright, please try this at home. Also, please feel free to give me feedback or thoughts on how yours went. If you have questions, ask them!
Enjoy!
Let's talk basic kneeds!
Sunday, April 28, 2013
Sunday, March 31, 2013
Whole Wheat Pita Bread!
Huzzah! Two in a row!
So, yes, I love cooking. I have to be honest though when I say that I love baking even more than cooking. I have been doing a lot of baking experiments, all of which I hope to post on this blog soon. I want to start tonight with the whole wheat pita I used as my side dish to the previous post (Curried Chickpea and Kale Soup).
Again, I got the original recipe idea from epicurious.com and modified it slightly to fit my liking. The link is at the bottom at this post.
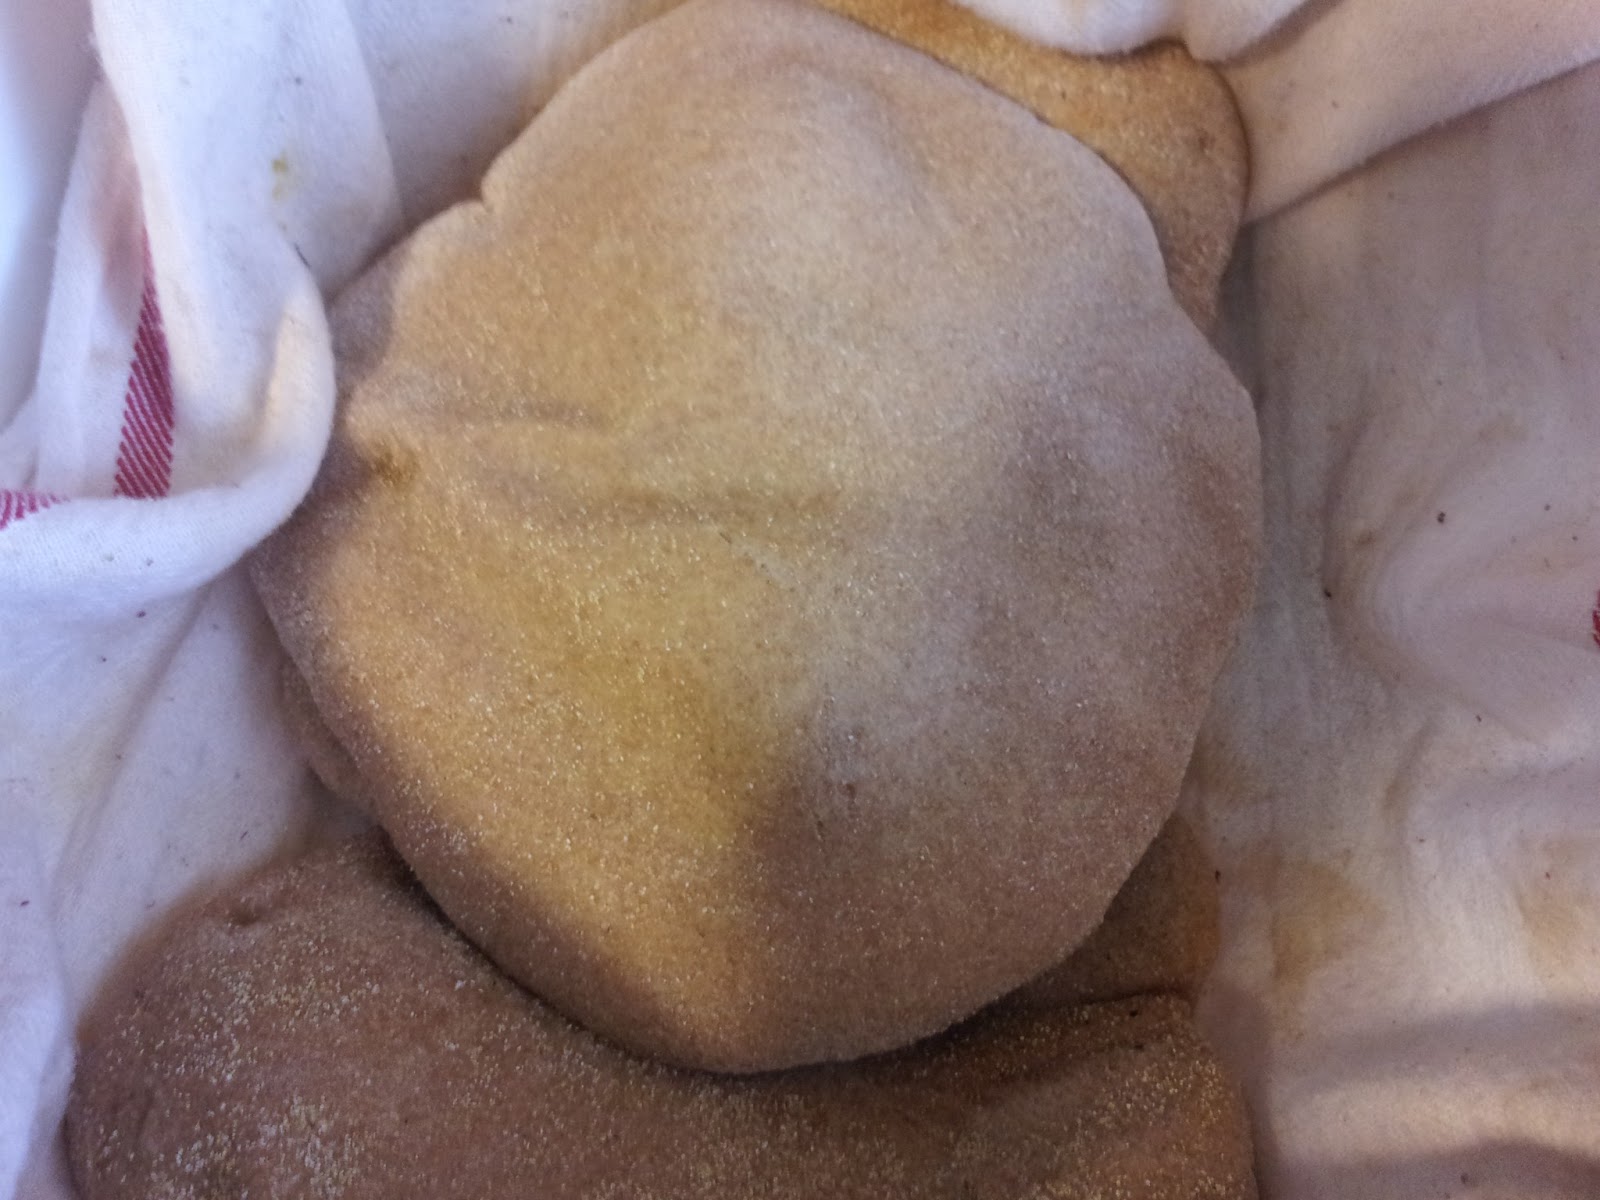
There it is. In all it's glory. So let's talk pita, yeah?
Ingredients:
1 (1/4-ounce) package active dry yeast (2 1/2 teaspoons)
1 teaspoon honey
1 1/4 cups warm water (100°F)
2 cups whole wheat flour, plus additional for kneading
1 cup white flour
1/4 cup extra-virgin olive oil
1 teaspoon salt
Cornmeal for sprinkling baking sheets
Alright, here we go:
Start by putting the water, honey and salt in a saucepan over the lowest heat possible. Using a thermometer, heat until it's about 100 degrees.
**Most recipes say that you can go as high as 115 degrees without killing your yeast, but I've never had luck going that high in temp**
Once heated, pour 1/2 the water mixture into a bowl with the yeast and let sit for about 5 minutes. You will see the yeast begin to foam (it looks like it's growing). If it doesn't do this, you need to start over with new yeast and water because you killed it. I've done it a thousand times.
While you wait, mix the flours together in a bowl.
After 5 minutes, whisk 1/2 cup of the flour mixture into the bowl, cover, and let double (45 minute wait here). It will look wet and foamy. I know, gross.
After 45 minutes, you get to add the rest of the flour and the oil in to form a dough! It will be a fairly soft dough, meaning it will be sticky to the touch. Then, dump (formal term is turn) the dough out onto a floured surface and begin to kneed the dough.
**Use the heel of your hands and turn the dough frequently for good kneeding technique)
Kneed the dough for 8-10 minutes (I always go 10) so it is smooth and when you pull on it, it bounces back. Now you get to put it into a greased bowl and let rise for an hour (double it's current volume).
What's next?! The fun part. After 1 hour, punch the dough down and dump onto a floured surface. Divide the dough into 8 equal parts (I'm really bad at this part). Have a sheet set aside with cornmeal sprinkled on it ready, and preheat the oven to 500 degrees.
**I have a brick stone that I put in my oven. If you have one USE IT**
Roll each equal part into a ball. Take one ball, flatten it, and roll it out until it's about 7" in diameter. Do this with all 8 parts!
After you're done, set each pita on the sheet with cornmeal (so it doesn't stick), cover, and let rest for 30 minutes.
When 30 minutes is up, place pitas 2 at a time on the stone and cook for 2-3 minutes.
**If you aren't using a stone, place them directly on the rack of your oven**
How do you know when they're done? You watch! They will puff up and when they are fully puffed, they are fully done!
Cool, huh?
This makes (yields) 8 pitas that you can serve nice, fresh and warm with ANYTHING! It's your life, do whatever you want with them! Let me know your creative ways though!
Let us talk basic kneeds!
Read More http://www.epicurious.com/recipes/food/views/Whole-Wheat-Pita-Bread-108122#ixzz2PAVps78t
So, yes, I love cooking. I have to be honest though when I say that I love baking even more than cooking. I have been doing a lot of baking experiments, all of which I hope to post on this blog soon. I want to start tonight with the whole wheat pita I used as my side dish to the previous post (Curried Chickpea and Kale Soup).
Again, I got the original recipe idea from epicurious.com and modified it slightly to fit my liking. The link is at the bottom at this post.
Ingredients:
Alright, here we go:
Start by putting the water, honey and salt in a saucepan over the lowest heat possible. Using a thermometer, heat until it's about 100 degrees.
**Most recipes say that you can go as high as 115 degrees without killing your yeast, but I've never had luck going that high in temp**
Once heated, pour 1/2 the water mixture into a bowl with the yeast and let sit for about 5 minutes. You will see the yeast begin to foam (it looks like it's growing). If it doesn't do this, you need to start over with new yeast and water because you killed it. I've done it a thousand times.
While you wait, mix the flours together in a bowl.
After 5 minutes, whisk 1/2 cup of the flour mixture into the bowl, cover, and let double (45 minute wait here). It will look wet and foamy. I know, gross.
After 45 minutes, you get to add the rest of the flour and the oil in to form a dough! It will be a fairly soft dough, meaning it will be sticky to the touch. Then, dump (formal term is turn) the dough out onto a floured surface and begin to kneed the dough.
**Use the heel of your hands and turn the dough frequently for good kneeding technique)
Kneed the dough for 8-10 minutes (I always go 10) so it is smooth and when you pull on it, it bounces back. Now you get to put it into a greased bowl and let rise for an hour (double it's current volume).
What's next?! The fun part. After 1 hour, punch the dough down and dump onto a floured surface. Divide the dough into 8 equal parts (I'm really bad at this part). Have a sheet set aside with cornmeal sprinkled on it ready, and preheat the oven to 500 degrees.
**I have a brick stone that I put in my oven. If you have one USE IT**
Roll each equal part into a ball. Take one ball, flatten it, and roll it out until it's about 7" in diameter. Do this with all 8 parts!
After you're done, set each pita on the sheet with cornmeal (so it doesn't stick), cover, and let rest for 30 minutes.
When 30 minutes is up, place pitas 2 at a time on the stone and cook for 2-3 minutes.
**If you aren't using a stone, place them directly on the rack of your oven**
How do you know when they're done? You watch! They will puff up and when they are fully puffed, they are fully done!
Cool, huh?
This makes (yields) 8 pitas that you can serve nice, fresh and warm with ANYTHING! It's your life, do whatever you want with them! Let me know your creative ways though!
Let us talk basic kneeds!
Read More http://www.epicurious.com/recipes/food/views/Whole-Wheat-Pita-Bread-108122#ixzz2PAVps78t
Curried Chickpea and Kale Soup
Alright. I'm going to try this whole blogging thing again. There is one thing I need to mention, however. It's going to be all vegan recipes from here on out. I do also want to point out though that just as easy as you can make a recipe fit for vegans, you can make these fit for meat and/or dairy consumers. Not that I encourage that though. :-)
It won't need it.
So this is a recipe that I modified from epicurious.com (the link is at the bottom of the page as a reference). It's an African soup and I did make a lot of changes.
Here are the ingredients (my modified ones):
Process:
This is so easy, that is part of why I loved it. You heat the oil in a large pot on medium heat. Add the onion, pepper and jalapeno and cook for 5-10 minutes or until they start to stick to the pan just slightly. Add the garlic and cook for about 1 more minute. Add the spices and STIR for 1 minute.
**This is really important. It opens up the spices when you cook them before adding any liquid to your concoction**
Add the veggies! (chickpeas, kale, broccoli, etc) Stir until they are coated with the seasoning goodness. Then add the tomatoes and veggie broth. Simmer (low boil) this for about 10-15 minutes. It will look like this business:
Rhen add the coconut milk and cilantro. Stir and let warm for as long as you want until you're ready to serve!
**The longer it sets, the better it gets!!
Now, I served this with fresh-made pita (recipe also on this blog). You can, however, serve this over brown rice and it would be just as delightful.
**Those of you who want to destroy it with your animal products can add any or all of the following:
- chicken or lamb (you will want to saute that in before you add the veggies)
- top it with plain yogurt or sour cream
- using ghee or clarified butter instead of oil for sauteing
Anyway, the link at the bottom is a direct one to the recipe I used. Let me know what you think! I think this is a good one to kick off my almost year hiatus from this website!
Let us talk basic kneeds!
Wednesday, July 4, 2012
Tortiallas Tortillas, Yum Yum Yum!
Okay,
Update. So Shortly after my last post, I took what ended up being two long-term substitute teaching positions that lasted until June. Then the whole month of June I was taking a class that required me to read three books a week plus I got a new roommate. So all of these things left me little to no time to cook anything more significant than a sandwich. What's that? You don't care? Get to the good stuff?
Okay, fine.
I am throwing a fourth of July party so there will be a couple of posts here in a row and then some. Today, we talk all about tortillas.
I love tacos. I grew up with taco night being one of my favorites. I never until now, however, discovered the value of making my own tortillas. Let me be very clear, this is super easy and less expensive than buying tortillas, it just takes time. So if time is not something you have, don't embark on this journey because you want it done right. The ingredients are simple, the process is simple; but the tortilla itself is delicate.
Here are the ingredients and process:
Yields roughly 18 tortillas
2 cups Mesa (find it in the Hispanic food section in the grocery store)
1 tsp salt
1 1/2 cup water
I mixed the Mesa and the salt together with my hands then I made a well in the bottom of my bowl. I poured the water into the small well and slowly incorporated the Mesa into it so my fingers didn't get too sticky. I repeated the same process with the rest of the water and ended up with a dough.
Now here is where things start to get tricky. Heat your skillet over medium high heat (cast iron is best but not completely necessary). You want to take a heaping tablespoon of the dough into your hands and form a ball.
The trick is, if your dough is too wet, it will be really sticky to the touch. If it is too dry, it will crumble. If your dough is too wet, you need to add more Mesa (I advise doing that by small spoonfuls). If your dough is too dry, you can do what I did. I kept a small bowl of water next to my dough and dipped my fingers in it and then worked the small ball of dough into the right consistency. It worked really well. The Mesa soaks up the water like a plant in a drought so adding more water to your big batch of dough really won't help much.
After you have your ball of dough, you will want to place it between plastic. I took a small sandwich bag and cut it open for this. You don't want your tortillas much larger than 4" in diameter. Place the ball of dough between the plastic.
Now, some people have a tortilla press. I don't. If you do, all you need to do is press the tortilla out. If you don't, you can do what I did. I took one of my bowls (a cereal bowl) and pressed it into a nice circle. Then I smoothed it out with my fingers until it was the exact size that I wanted.
From here, your skillet should be ready to go. Peal the top layer of plastic off and brush that side with some vegetable oil. Then CAREFULLY peal the bottom plastic off and lay the tortilla into the pan oil side down.
I must tell you that my first attempt at this was a literal flop. I broke probably 4 tortillas which, with how many I ended up making (67), those aren't bad odds. Basically I am saying you will screw up at least one. It's okay. The reason is that once you lay it down in the pan, that's how it stays. So if it folds over itself when you lay it down, you can't really unfold it. That's your warning. You will get it though. I have every bit of confidence in you.
These cook fast. The oiled side you want to cook for about 2 minutes (my indicator was I heard the sizzling stop). Then, you flip it and cook for an additional 15-20 seconds then remove from the heat.
You can make it ahead of time if you want. Let them cool and store them in a plastic bag. Or, you can choose to serve them piping hot and right away! If you make them ahead of time, just heat up the skillet and throw them on for a few seconds to warm them up for your friends and family. :-)
I recommend topping these with something simple. If you eat meat, maybe some barbacoa or shredded chicken with some raw onion and tomatoes. If you are a vegetarian/vegan, maybe some fajita veggies or some pablano peppers with some avocado slices. With these, simple is best. You want to taste everything.
Please let me know how this goes for you if you try this at home and...
Sunday, March 25, 2012
Wonton Raviolis with Basil Brown Butter Sauce
Hey everyone!
So I think that the more irritated I get with my day, the better I cook at the end of it. I wandered around the kitchen in search of what I was going to make. I had pretty much decided and then I went the opposite direction. I have been wanted to experiment with the different uses of the wonton wrapper and I found some at a reduced price at the grocery store; thus, the experiments begin!
I knew I wanted to experiment with a few specific recipes. I want to conquer:
- crab rangoon
- raviolis
- pot stickers
- mini lasagnas
Tonight, I started with the raviolis. I love to fly by the seat of my pants when I cook. I LOVE making up stuff as I go. I usually end up with great ideas when I let the juices flow. This was one of those occasions.
What ended up happening was a cheese ravioli with a basil brown butter sauce. This was SO EASY and it literally took me 25 minutes start to eating and it makes 4 servings. What I love about the wonton wrappers is that it's lower in calories (so you can have a butter sauce with it) and really easy to work with. Here is how to do it:
The Raviolis
The Filling:
1 cup cottage cheese
1 egg
1/3 cup Parmesan cheese
1/4 cup chopped green onion
1 tsp garlic powder
1 tsp dried basil
salt and pepper
1/2 tsp red pepper flakes
32 wonton wrappers
water and olive oil
In a small bowl, mix cottage cheese, onions, egg and Parmesan cheese. It should be easily blended. Then add the spices, stir, and let rest while you assemble the wrappers.
Preheat oven to 375
Brush two baking sheets lightly with olive oil. Place 8 wonton wrappers per baking sheet down and add one spoonful of the filling to each wrapper (there will be a small ball in the center and plenty of space on all sides of the wontons). Then you are going to dip your finger into some water and wet the circumference of each filled wonton wrapper. Then place another wonton wrapper on the top and press down until sealed.
Brush the tops of each ravioli with olive oil. Place both baking sheets (16 raviolis total) into the oven for about 9 minutes. The tops of the raviolis will start to puff up and you will smell the filling cooking. Remove from the oven and let set until the sauce is ready.
The Sauce
1 medium onion chopped
1 orange pepper chopped
1 cup chopped chicken breast (I used tofu chicken breast substitute)
3 medium mushrooms sliced
1 T minced garlic
1 tsp basil
salt and pepper
6 T butter
Start by sauteing onions and garlic together in 1/2 T of the butter on medium heat until the onions are soft. Add the chicken (or tofu) and stir for 1 minute. Add the peppers, mushrooms and seasonings and stir for about 3-5 minutes. You want your orange peppers to be slightly softened. Then add the rest of the butter and immediately reduce the heat to low. Throw in the raviolis and stir to coat in the sauce. Stir the butter and let it set until it starts to turn brown. Serve.
I finished this off with a little Parmesan cheese. This is really tasty and easy. I ate this with a solid glass of wine on the side. It's fun to put together with kids or a spouse. It's a great way to get some help in the kitchen and being quick about it. I highly recommend throwing the ravioli into the sauce and mixing it before you serve it. I just poured the sauce on the top and I found the edges of the wontons a little crunchy. Throwing the raviolis into the sauce before serving should remedy that. Let me know how it turns out for you!
Sunday, February 19, 2012
Peanut Butter, Oatmeal, Chocolate Chip Cookies!
Hey guys!
So this is a tried and true recipe for me. It's my go-to cookie recipe when I want to give a gift or just make something that I know people will enjoy! It is, by far, my favorite cookie next to my sentimental molasses cookies :).
Here is the recipe:
Wet ingredients:
1 stick of butter
1/2 cup of sugar
1/2 cup brown sugar
1/2 cup peanut butter (crunchy or creamy)
1 egg
1 1/2 tsp vanilla extract
Dry ingredients:
1 cup flour (I use whole wheat)
1 cup oats
1/2 tsp baking soda
1/2 tsp baking powder
1/4 tsp salt
1/4 tsp cream of tartar (optional)
1+ cup of chocolate chips or chunks
Preheat oven to 375
Mix the dry ingredients.
Beat together the butter, sugar and peanut butter until creamy. Then add the egg and vanilla and beat until it's just blended. Add the dry ingredients in two batches and stir together with a wooden spoon. Stir in chocolate chips and add as many as you want! Let the dough sit for about 5-10 minutes. Spoon dough with a spoon onto a baking sheet and bake for about 10-12 minutes depending on your oven. This yields about 40 cookies.
These are super easy and super tasty. Let me know how they turn out for you!
Let us talk basic kneeds!
Saturday, January 14, 2012
Whole Wheat Pizza Crust!
Okay,
It has been a really long time since I have posted a recipe and I attribute it to business. This means I have less time to be creative and try out new things. Tonight, however, tonight was different.
I took my first whack at a whole wheat pizza crust.
I think it turned out pretty good. Here is what I did:
CRUST (makes 2 pizzas)
1 package active dry yeast
1 1/4 cup warm water (DO NOT EXCEED 115 degrees!!!)
1 tsp sugar
1 T olive oil
1 tsp salt
2 1/2 cups Whole Wheat flour (plus some for kneading)
You want to place the yeast in a large bowl and add the water. The reason why you don't want the temp of the water to get higher than 115 is because you will kill the yeast and your dough won't rise (PROBLEM!). Then you stir in the sugar and let this mixture rest for 5 minutes. (You will see the yeast popping up in the water. This is a very good thing).
After 5 minutes, add the oil and the salt and stir. Then begin to stir in the flour 1 cup at a time. The dough will become slightly stiff and pull away from the sides of the bowl.
Then you want to turn the dough out onto a surface that has a little bit of the flour on it. You will now knead the dough for about 8 minutes or until you don't feel any lumps in it. (In recipes they call this "smooth").
After you are done here, you want to lightly coat the dough with olive oil, place back into the bow, cover and let raise for about 45 minutes. (They call this "double size" in recipes)
**If your dough is not increasing in size, you killed your yeast and should probably start over**
While your dough is rising, it's time to prep the sauce and toppings!
SAUCE (makes enough for both pizzas)
1 can tomato sauce
2 tsp minced garlic (about 2 cloves fresh)
1 tsp dried oregano
1 tsp sugar
1/2 tsp crushed red pepper
1/2 tsp fennel seed
salt to taste
You just want to mix all of these ingredients together. **Be sure to taste it!!!**
Also now is the time to get any cheese (about 8 oz mozzarella per pizza) and other toppings ready for assembly!
Preheat your oven to 450 degrees now!
After your dough is done rising, you get to punch it down (fun part) and split into two equal parts. You can either make both pizzas or store the other for a later date by wrapping it in plastic wrap and freezing it!
Now you get to spread the dough out onto a greased either baking sheet or pizza pan and poke holes in it with a fork!
This is a fun part to do with the kids. I always loved doing this when I was one!
As you can see, it will cover most of one whole baking sheet. Now you will put your crust in the over for about 10 minutes. Remove your crust from the oven and top your pizza (sauce, parm cheese, toppings, mozzarella)! Again this is a fun part for the kids! (I took my crust off the hot pan and placed it on a cooling rack so I didn't get burned while assembling!)
Once your pizza is ready, place it either back on the baking sheet or on your baking stone (preheated in the oven) and bake for about 15-17 minutes (bake time may vary depending on oven) or until your cheese is bubbly and brown!
Once it is done, remove it from the oven and let it cool for about 5 minutes. Then you can cut it and enjoy!
Please let me know how yours turns out! I really enjoyed mine!
Let us talk basic kneads!
Tuesday, October 11, 2011
NSA Peach Pie (It's not what you think)
Okay,
So first of all another apology goes out to you for me not blogging in like, forever. Business has made it difficult to stay updated. I know, that's no excuse. So here is a recipe that I created for my parents when they came to visit a few weeks ago.
It's a no-sugar-added peach pie. By this I mean, I did not add any white or brown sugars; however, It was sweet (without fake-sweetener) and pretty darn tasty.
Are you intrigued? Good.
Here is the recipe:
Crust:
2 cups flour
1/4 cup cold butter- chopped in pieces
1/2 cup shortening
Salt
Ice water
Mix flour and salt together and add shortening and cold butter and cut into flour using a flour cutter until it's mixed in well and crumbly. Add ice water in small increments until you are able to form a firm and semi sticky ball of dough. Wrap dough in plastic wrap and refrigerate for at least a half an hour.
Filling:
5-6 medium to large yellow peaches (skin removed and sliced thin)
2-3 TB of corn starch
Salt
1 cup of peach schnapps
Heat schnapps in a saucepan until boiling. Boil until it is reduced by half. This will form a syrup. Cool and set aside. Place peaches in a bowl and add cooled syrup to them. Mix well and add salt to taste. Let this mixture sit while you roll out pie dough on a floured surface.
Heat oven to 375 degrees
Roll out until thin (about 1/8 inch thickness). Fold dough gently in half and then half again to transfer to the pie pan. Unfold the dough and gently press it into the pan to fill it evenly. Trim the edges leaving a little extra dough to pinch up around the top for the finished crust look.
With the remainder of the pie dough, roll it out again to the same thickness (1/8"). Slice the dough into strips and begin weaving like a basket for a lattice top.
**This takes a little time and practice but it's so worth it**
If you do not want a lattice top, you can just roll it out as a rounded surface to top your pie completely.
**If you do this, you will need to cut 2-4 slits in the top of your pie for baking purposes**
Place pie in oven and bake until the filling is bubbling around the edges and the crust is brown (about 50-55 minutes)
If you have trouble with your crust and it begins to brown too quickly, you can place foil over the top of the pie about halfway through and remove with about 6-10 minutes of baking left.
Let me know if you try this! My family loved it. It's delightfully sweet and simple. There's not much to this which makes it even better! Give me your feedback!
Let us talk basic kneeds!
Friday, August 12, 2011
What do you think? Should we jam?
Hey guys,
So there has been this thought brewing in the back of my mind for the past few months and I want to get your opinions on it. I am one of those lucky people that was raised on home-grown veggies and fruits. I am also one of those weirdos who never had to taste store-bought jelly or jam until I went to college. (I know, crazy right?)
Because I was raised this way, I was taught many tricks of the home-grown/homemade trade like gardening, cooking, baking, canning etc. (hence the blog). My parents taught me most of what I know today and for that I am eternally grateful. They read this blog so I also want to note that I am not attempting to suck up to them right now. :-D
Anyway, all this being said, I was taught how to can things like sauces, vegetables, fruits, tomatoes, jam, and jelly. Over the past few years I have done a lot of experimenting and have come up with what I feel is an awesome recipe for strawberry jam. This is something that I have given away to several friends and they have enjoyed it on sandwiches, ice cream or just straight out of the jar.
Here is where your opinion comes in...
My housemate has told me on several occasions along with a few others that I should put this stuff on the market. I am seriously contemplating selling it. The question is: If I sold this, would you buy it?
If you have not tasted it, then you don't know; but if you have, then you know the answer to that question. I am curious of your thoughts and opinions. If you have not tasted it, I will gladly give you a sample jar to taste! :-D
** I want to note that an awesome opportunity to try this is tomorrow (Saturday, August 13th) at The North Market starting at 9 am!**
Post, comment, etc. Let me hear you!
Sunday, July 31, 2011
Mmmmmm Baked Beans!
Alright,
So it's still picnic and cookout season. When the question is raised: "What do I bring?", someone inevitably says: "Why not baked beans?" The problem with this is that you need a good recipe. Sometimes it's too sweet, sometimes too salty and there is almost always never enough bacon in them. Well, my friends, I am proud to announce that I have concocted a recipe that I deem utterly appropriate for all cookout occasions. With a little help from a recipe I found on epicurious.com, these may be the best baked beans I have ever tasted.
Here it goes:
8 slices thick cut bacon
1 large onion- chopped coarsly
1 T spicy brown mustard
1 T minced garlic
1 1/2 tsp dried Thyme
3/4 cup Ketchup
1/4 cup apple cider vinegar
fill a 1/3 measuring cup half with a dark, robust molasses and the other half with honey
1 T brown sugar
1/3 cup water
2 small bay leaves
1 can red kidney beans
1 can cannellini beans
1 can black beans
Preheat oven to 350 degrees
Alright, you are going to start by cooking your bacon until crisp then setting aside to drain. Crumble bacon. Remove some of the drippings from the pan and then add the onions. Cook these until soft and somewhat losing their color. Add the mustard, garlic and the thyme and cook for 1 minute until fragrant. Then add the next 6 ingredients and stir for 1 minute. Add the beans and bacon, mix well and transfer to a baking pan.
Bake this for about 45 minutes uncovered stirring once halfway through. If the beans look like they are getting dry, add water by the Tablespoon. (I didn't have to).
This recipe is fairly easy and fast to make! That is what I loved about it. It's tangy from the apple cider vinegar; but not too sweet from the sugar (because I didn't add a ton).
Let me know how yours turns out if you make this! Hopefully you enjoy it!
Let us talk basic kneeds!
Tuesday, July 5, 2011
New things to come this summer/ Mango Bean Salsa
So guys,
I have been crazy busy this summer. I thought to myself, oh I will get some time off. I'll cook, bake and blog; but no! I have been just as busy. Camps and work and weddings everywhere! I am also deeply considering selling my strawberry preserves over the internet. Let me know if that would interest any of you followers out there! Anyway, that's no excuse you say. To that I say you're right! So, a preview of things to come:
I am going to be:
baking breads
making pies
experimenting with salads/salsas
showing you the best baked beans you ever would taste
much much more!
Most of that is not happening today because I don't have it all prepared. I did, however, need to get on here and make sure you knew I was still alive and to share one quick fresh recipe. Another thing to note is that I have been eating a lot of sandwiches lately. Oh my I dig a good sandwich.
Anyway, I made a salsa with my dear friend Elizabeth last night. We were just messing around and here is what we came up with:
Mango and bean Salsa
6-8 ripe tomatoes roughly chopped
2 medium onions chopped
two mangos diced
3 cans of beans (your choice but we used black)
2 T (or more) minced garlic
2 small limes, juiced
1 medium bunch of fresh cilantro finely chopped
salt and pepper to taste
You are just going to literally mix this all together in a big bowl. No special order, no nothing! Nice, right?
This makes a TON of salsa and it's really darn tasty and easy.
Eat this with corn chips mmmmmmmmmmm. It's a nice summer side dish. Let me know how yours turns out.
Sunday, May 15, 2011
The one, The only, The MAPLE BACON CHEESECAKE
Okay,
First of all I must deeply apologize to all of you who follow this blog because I have not posted in a very long time. I have been so unbelievably busy with work that I have hardly had any time to myself let alone to blog. The good news is that I am making up for this gap in time with one doozy of a recipe.......
So I was asked to come up with some crazy concoction for a friend of mine's going away party. His specifics were thus:
Cheesecake
Bacon
And then I said: "OK"
I decided that the best route to take in this would be to include an ingredient that would agree with both parties.
Maple Syrup.
Thus the Maple Bacon Cheesecake is born:
Here goes the recipe:
Ingredients (in the order needed)
1 lb of bacon
4 Tbs pure maple syrup
2 cups cinnamon graham crackers (about 15-17 whole crackers) crushed
1 stick of butter
3 Tbs sugar
1 cup pure maple syrup
3 packs of cream cheese (room temperature)
1/2 cup packed brown sugar
3 Tbs flour
2/3 cup sour cream
2 tsp vanilla extract
4 eggs
Here is your disclaimer:
**This recipe is not for the faint of heart or the pressed for time. This is legit.**
The first thing you must do is candy the bacon. I used maple syrup but you can use brown sugar if you would like.
Turn on the broiler. Place your bacon out on baking sheets and coat (using your hands) each slice of bacon with maple syrup. Place baking sheets and broil bacon until dark and crispy (time varies depending on thickness of bacon so keep your eye on it). It is very important that your bacon is very crispy even on the edge of looking burnt. Remove bacon from broiler when it's finished and place it on a paper towel to dry.
As you let the bacon cool, you will want to place in a bowl the next three ingredients listed (graham crackers, butter, sugar). Mix these together well so that you can form clumps in your hands when the ingredients are squeezed. Then crumble up 5-6 pieces of the bacon and mix it into the crust. Press down the crust ingredients into a 9 in spring-form pan lined with wax or parchment paper until even and flat. Bake the crust at 375 degrees for 10 minutes or until starting to brown. Remove from heat and let it cool completely. Reduce your oven temperature to 300 degrees.
While the crust is cooling, place the maple syrup into a saucepan and bring to a boil. You will want to continuously stir this with a whisk for about 7 minutes or until it is reduced by at least half. Pour this into a bowl and let stand and cool. **I take mine to nearly a candied state**
In a separate bowl, beat the cream cheese until it is smooth. Add the sugar, flour and salt and beat again until smooth. Then you will add the reduced and cooled maple syrup, sour cream and vanilla extract and blend this until it is smooth. Then you will add the eggs (one at a time) and beat in until just barely blended. Then you will stir (not beat) in all the rest but 4 pieces of the candied bacon into the batter. Pour this onto the crust in the spring-form pan and bake at 300 degrees for about an hour and a half or until the sides of the cake are puffy and the center trembles slightly. Remove from heat and let cool completely. Sprinkle with the remaining 4 pieces of candied bacon (crumbled) and serve!
Let us talk basic kneeds!
Sunday, March 20, 2011
Vegetable Curry- So good
Okay, so curry is one of my favorite things to make. I love it. I love it's taste, texture, color, abundance and it's non-dairy glory. I have reviewed/tried several recipes for curry. I have decided that none of them really suit my fancy. So I concocted my own recipe. The best way to cook this is in a dutch oven on the stove top. If you don't have a dutch oven, you can just use a large heavy saucepan. It will definitely need to be large because you will be making a lot of curry!
Curry is easier to make if you start by prepping everything before you start cooking. Once you start cooking, it moves pretty fast.
1 cup chopped Onion
2 large carrots, peeled and diced
2 medium-large potatoes, peeled and cubed
1 can chickpeas, drained
2.5 cups mixed frozen vegetables (I use stir-fry veggies)
2 cups tomatoes chopped WITH the juice (fresh or canned)
**Having your ingredients prepped before you start cooking makes it WAY less stressful! I also prep my spices. You can look ahead in the recipe and get all the spices ready in a bowl for when they go in!**
In this large saucepan or dutch oven, begin by heating about 1.5 Tbs of vegetable oil over medium heat. Once the oil is ready, begin sauteing the onion.
**The way you know your oil is ready is to get a little bit of water and splashing it on the oil. If you hear it make a crackling sound, it's ready!**
After sauteing the onions for about 5-7 minutes or until translucent, add 1 Tbs chopped Garlic and saute for another 2 minutes. Now it's time to add the spices:
2 Tbs Curry Powder
1 Tbs Tumeric
1.5 tsp Cumin
1/2 tsp Cinnamon
1.5 tsp Basil (1 Tbs if fresh)
1 tsp Crushed Red Pepper
Salt and Pepper
You are going to saute the onions, garlic and spices for about 1-1.5 minutes or until fragrant. This means that you will actually be able to smell the combination of spices as you stir the mixture. Stir frequently because it will burn easily if you aren't careful. Next, you are going to add the carrots and potatoes. You want to stir this well for about a minute. Make sure they are well covered with the spices. Next you will add the chickpeas and the tomatoes with their juice. This will generate liquid in your pan and stirring will get easier. Finally you will add your remaining veggies and:
1 can Coconut Milk
2 Tbs Peanut Butter
2 small Bay Leaves
1 tsp Lemon Grass (optional but it makes a difference if you have it!)
1 tsp Grated Orange Peel
I told you this moves fast! Once you start cooking, you will only be doing about 12 active minutes of cooking! Now it's time to let this simmer. You won't need to simmer it too long, only about 30 minutes or until you reach your desired consistency. You want to make sure the potatoes are done (tender when poked with a fork).
You will want to serve this with rice. Any rice will work. I like to cook mine with either vegetable or chicken broth to give it more flavor!
Garnish this with basil, a dash of cinnamon, and some orange peel. Peanut butter is also a good garnish!
**This recipe is vegan! Unless you cook your rice with chicken broth, of course. Feel free to add chicken or shrimp to this delicious recipe!**
I really hope you try this! Let me know how it turns out!
Subscribe to:
Posts (Atom)