Wednesday, December 29, 2010

Winter Vegetable Soup

Okay, I almost followed this recipe to a "T" from epicurious.com.  It is that time of year folks, winter.  Pretty much all I want to eat during winter is soup or stew.  I get this way because there is just something so satisfying about having a nice hot bowl of something to fill your stomach when it's cold and windy.  I have some great recipes from home for soup that I can't wait to share; but first, a simple yet hearty soup to start us off right!  This is not the prettiest soup; but, man, is it sure good!

*This is vegetarian/vegan because there is no dairy or meat product in it.*

Here is the original recipe:
Winter Vegetable Soup

1 medium onion, chopped
1 Turkish or 1/2 California bay leaf
2 tablespoons olive oil
1 large carrot, thinly sliced
1 celery rib, thinly sliced
1 tablespoon tomato paste
1/2 pound sweet potato, peeled and cubed (1/2 inch)
1/2 pound Yukon Gold or boiling potatoes (russet), peeled and cubed (1/2 inch)
2 cups reduced-sodium vegetable or chicken broth
1 1/2 cups water
1/2 cup frozen peas
2 tablespoons chopped fresh dill
*If you do not want to make this vegetarian, you can use the chicken stalk and add about 2 cups of shredded or chopped up chicken!*
 
The only modifications that I made were as follows:
 
- I first doubled the recipe
- I cut up one box of white mushrooms and added it to the soup
- Instead of peas, I used 1 1/2cups broccoli (frozen)
- I added about two Tablespoons of minced garlic
- I substituted basil for dill


You will want to start by cooking the onions and bay leaves in the oil in a heavy, large pot over medium heat until the onions are soft.  Then add the celery, garlic and carrots and cook for about another 3-5 minutes.  Then you are going to add the tomato paste and basil and cook for about another minute.  Add the mushrooms, potatoes, broth, water and 1 tsp of black pepper.  Simmer this until the potatoes are tender (about 20-25 minutes).
Now you have two choices.  You could leave the soup as it is.  OR  If you have a hand blender that you can submerge into the soup, you can puree so that SOME not all of the soup is smooth. (*This adds great texture*).  You could also just remove 1 cup of the soup and puree it in your blender.  (*If you do this, BE CAREFUL.  The liquid is hot, don't splash it on yourself*) 
After you make your choice, THEN you are going to add the frozen broccoli and simmer the soup until it is cooked through (about 5 minutes).

This is so quick and easy!  It makes a lot!  It's a great recipe!

Then you can serve!  I recommend this with crusty bread!  It is really tastey with a dash or two of hot sauce, black pepper, or more basil.  You can also (if you can have dairy) garnish this with a bit of sour cream. 


 I hope yours turns out great as well!  Let me know!


Let us talk basic kneeds!
 

Friday, December 17, 2010

Caramel Cashew Crunch- The Good Stuff

This is the recipe some of you have been waiting for.  First of all, I must give credit where credit is due.  I obtained this recipe from a friend's mother.  Mrs. Givens, thank you.  I started making this for Christmas a few years ago.  My dad started taking it into work and people kept asking for the recipe.  I would always be back at school or just didn't give it out.  This is a super easy and delicious recipe that will really be appreciated during the holiday season!  Today is your lucky day because here it is!

Caramel Cashew Crunch

2 sticks (1 cup) butter
*You could always use soy butter for this and it should caramelize the same way!*
2 cups brown sugar
1/2 cup dark Karo syrup

Melt the butter in a medium sauce pan and add the Karo and brown sugar.  Bring this mixture to a boil SLOWLY. *I mean slow, people.  This is sugar.  It will burn.* Stirring the mixture constantly.
Once it comes to a boil, you are going to boil it for 1 full minute stirring constantly.  After that minute, remove it from heat and add in this order:


1 teaspoon vanilla extract
1 teaspoon baking soda


Once you have added these ingredients, continue to stir.  Your caramel mixture will begin to turn lighter and get puffy.  Somewhat like cotton candy.  Once this happens, pour it over:

In a large bowl-
1 box Crispix Cereal
1 can (8-10 oz) cashew halves and pieces


Mix this well!  Coat everything.  Once everything is coated, place the mixture on two baking sheets and bake at 235 for 30 minutes.  I always switch the baking sheets' positions in the oven after 15 minutes so they cook evenly.  Once it is finished, spread it out onto wax or parchment paper to cool. 
And you're done!  :-D


Enjoy making this for your friends and family!  Let me know how yours turns out.


Let us talk basic kneeds!

Monday, December 13, 2010

Walnut Shortbread Cookies with Powdered Sugar Glaze

So here is yet another recipe that I modified to my liking.  I, unlike the other recipes where I posted the original, am not going to do that this time because I didn't like it very much.  I strayed so far away from the original recipe that it is nearly useless to post it.  I looked at the recipe and saw that it was simple, yet it needed something else.  Something that complimented the walnuts a little bit better than the original recipe gave.  I also added a glaze to it at the end.  
Here is what I came up with:

1 1/4 cups flour
1 cup finely chopped, toasted walnuts
1/4 teaspoon baking powder
a pinch of salt
1 stick of butter
1/3 cup powdered sugar
brown sugar*
molasses*
1/2 teaspoon vanilla extract
a few drops of almond extract
1 egg

*For the brown sugar and the molasses, you are going to use one 1/3 cup measuring cup, fill it halfway with packed brown sugar, and finish the 1/3 cup with molasses.  Essentially, it is 1/6 cup of each the brown sugar and molasses.

To toast the walnuts, you are first going to preheat your oven to 325 (also the baking temperature for the cookies).  You will then measure one cup of walnuts and chop them very finely.  
*The more fine they are chopped, the better the texture of your cookie.*
You will then put the walnuts on a baking sheet and toast for about 10 minutes.  
*You really have to watch these so they don't burn!  I burned my first batch :-D

You will then measure out the flour, walnuts, baking powder and salt in a bowl and set aside.
Place the butter, vanilla and almond extracts, and the sugars in a bowl and beat until slightly fluffy.  Then add the egg and beat until well mixed.  Next, add the flour mixture and stir until well mixed. 
*This dough will be VERY stiff and rather crumbly*
You are then going to wrap the dough in plastic and refrigerate it for about 20 minutes to half an hour.
After that time has passed, you are going to place the dough on a floured surface and roll out until the dough is about 1/4" in thickness.  
Either using a cookie cutter or the lid of a jar, cut the cookies out and place them on a baking sheet lined with parchment paper or wax paper.  Continue to gather the scraps of the dough and rolling it out to make as many cookies as possible!


Place the cookies in the oven and bake at 325 for about 20 minutes (mine too 17).  
*Make sure you are watching the cookies after the 15 minute mark so they do not burn on the bottom!
Cool them on a baking rack.


Mix together about 3/4 cup powdered sugar, 1/2 teaspoon vanilla extract and ABOUT 2 Tablespoons of milk until it is the consistency of a glaze.  Drizzle this glaze over cooled cookies and let sit until hardened.


Here is what they looked like!


Don't get discouraged if these don't work out like you want them to the first time!  I definitely liked my second batch wayyyy better than my first!


Let me know how yours turn out!


Let us talk basic kneeds!

Tuesday, December 7, 2010

Tis the Season for Hot Drinks! Chai-Spiced Hot Chocolate (You can make this non-dairy!)

I love hot drinks.  I love this time of year where hot drinks are necessary.  I love the great smells that can fill a kitchen or a house when you are making hot drinks.

Okay, enough.  I love it all.  I am going to share yet another recipe from epicurious.com that I modified.  The recipe is for Chai-Spiced Hot Chocolate.  Of course you can make traditional hot chocolate; but this is a nice and refreshing, spicy twist to a tasty hot chocolate.  Here is the original recipe:

4 cups low-fat (1%) milk
3/4 cup bittersweet chocolate chips
10 cardamom pods, coarsely cracked
1/2 teaspoon whole allspice, cracked
2 cinnamon sticks, broken in half
1/2 teaspoon freshly ground black pepper
5 tablespoons (packed) golden brown sugar, divided
6 quarter-size slices fresh ginger plus 1/2 teaspoon grated peeled fresh ginger
1 teaspoon vanilla extract, divided
1/2 cup chilled whipping cream
I made some changes because, first of all, this recipe would cost a lot of money if made this way.  Let's face it, most of us don't have the cash to just toss around on hot chocolate recipes.  Not me especially.  So, I made some changes and found myself and my roommate along with her fiance, very happy with the results.

I substituted almond milk with a little bit of heavy whipping cream (3-4 Tablespoons) instead of the 1% milk.  The almond milk gave it a nice nutty aftertaste and an interestingly silky/thicker texture.
I used Ghirardelli 75% cocoa for my recipe.
I omitted the cardamom pods
I used 2-3 teaspoons of ground cinnamon
I substituted clove for allspice and added  1/2 a teaspoon of nutmeg additionally.
I omitted the ginger as well

You are going to basically add the milk, chocolate and spices/extract all together and heat VERY SLOWLY on medium to medium-low heat until it hits a boil.  That is when you know it is done!

I know this is a ton of modifications; but it is also quite a bit less expensive and we LOVED the turn-out.  Of course, this recipe would probably be tasty as is; but we really loved this.  It didn't even need the whipped cream.  If anything, it could have used a few tasty, toasty marshmallows on the top!


Let me know if you try to make this!  Also, something to note, if you are vegan or lactose intolerant, all you need to do is omit the heavy whipping cream and use soy chocolate instead! *If you use the soy chocolate, you may want to add a bit more sugar*  :-D
I hope you enjoy this. Let me know how yours turns out!

Let us talk basic kneeds!

Monday, December 6, 2010

Last Turkey Day Post- Mashed Potato Casserole with Gouda and Bacon

Okay,

So the reason why I take so long to post is because I want to leave a good amount of time in between recipes.  I feel like it might get overwhelming if I just post everything I have when I have it.  The truth is that I have at least three recipes in my head right now, but I am only going to put one down today.

As our final side dish for Thanksgiving, we had a potato casserole and it was awesome.  I almost nearly followed this recipe to a "T" from epicurious.com I only made a few changes.  Here is the original recipe:

6 slices thick-cut smoked bacon (preferably applewood-smoked)
3 large green onions (white and pale green parts only), finely chopped
3 pounds russet potatoes, peeled, cut into 11/2-inch cubes
3/4 cup sour cream
1/3 cup whole milk
1/4 cup (1/2 stick) butter
2 cups (about 8 ounces) coarsely grated smoked Gouda, divided
  
The only differences that I had from this recipe was that I used two or three more pieces of bacon and I did not use any butter.  I used the bacon grease.  OH YEAH!
The reason why I did that was because the butter really wasn't necessary and the bacon grease added more flavor to the potatoes.

For the record, it was awesome.  Unfortunately, I don't have a picture.  It got eaten before I could get a shot off.


First, you are going to boil the potatoes and cook the bacon.  Once the bacon is done, chop it and place it aside for later.  For the potatoes, you will want to put the cubed potatoes into cold water and heat it that way.  It is just the best way I have found.  Salt them and boil the potatoes for about 15 minutes or until soft.

Next, you will want to drain the potatoes and place them back into the original pot and turn the heat back on.  You will cook the potatoes until you see a slight film on the bottom of the pot (this is how you know most of the liquid is out).  You will then add the whole milk, bacon grease, and sour cream to the potatoes and mash them thoroughly.

Next, you will add 1 1/2 cups of the smoked Gouda, green onions and bacon to the potatoes and stir until well mixed.  The final step is to sprinkle the rest of the Gouda on top and bake for 35-40 minutes or until the cheese is crusting on the top and you can hear it sizzling.


*This can be made ahead of time.  You could prepare this dish earlier in the day or the day before.  If you do, just cover the dish with plastic wrap and refrigerate.*
**If you do make it ahead of time, add about 5-10 more minutes to your bake time**


This would be a great side dish or some great comfort food for this winter.  I hope you like it!
Let me know how yours turns out!


Let us talk basic kneeds!

Wednesday, December 1, 2010

Turkey Day- Minus the Turkey Part 2 (Stuffing)

Okay, this was the best stuffing I have ever had in my life.  I just want to start with that.  
This is a Wild Mushroom and Spinach Stuffing.


I found the recipe on epicurious.com and I ended up cutting it in half.  Here is the original recipe:


3/4 cup (1 1/2 sticks) unsalted butter, divided
1 tablespoon olive oil
1 pound assorted fresh wild mushrooms (such as chanterelle, stemmed shiitake, and crimini), cut into 1/2-inch dice (about 9 cups)
3 cups chopped onions (about 1 pound)
2 cups chopped celery (4 to 5 stalks)
1/4 cup chopped fresh Italian parsley
2 tablespoons chopped fresh sage
2 tablespoons chopped fresh thyme
1 5-ounce container or bag baby spinach leaves
12 cups (generous) 1-inch cubes day-old pain rustique or ciabatta bread with crust (about 1 1/4 pounds)
2 large eggs
1 1/2 teaspoons fine sea salt 
1 teaspoon coarsely ground black pepper 
1 cup (or more) low-salt chicken broth
 
 
Here is what I did:

 3/4 stick butter, divided 
1/2 pound assorted fresh wild mushrooms (such as chanterelle, stemmed shiitake, and crimini), cut into 1/2-inch dice (about 4 1/2 cups)
2 cups chopped onions (about 1 pound)
1 1/2 cups chopped celery (3 to 4 stalks)
2 T Parsley
1 tablespoon sage
2 teaspoons rosemary
1 5-ounce container or bag baby spinach leaves
6 cups 1-inch cubes day-old ciabatta bread with crust
1 large egg
1 teaspoon coarsely ground black pepper
1 cup low-salt chicken broth
 I started by putting about 1/4 of the STICK of butter in a skillet and, after heated, adding the mushrooms and cooking them until they are tender and slightly browned.  I then put them into a bowl set aside.
I added the remained 1/2 of the STICK of butter and melted it in the same pan.  I added the celery and onions to the bowl and cooked them until they were softened and not quite translucent.  I then added the spices all at the same time, a pinch of salt and the pepper and sauteed it for about 1 minute so it becomes fragrant.  I then added the spinach for about 30 seconds just so it wilts slightly.  I then added them to the mushrooms set aside. 

I put the 6 cups of ciabatta bread onto a baking sheet and toasted it at 350 for about 10 minutes just until it was crisp but not browning.  After that, let the bread cool.

After it is cooled, add it to the vegetable mixture and mix WELL. *It is very important to mix stuffing well*
Whisk the egg and add the broth to the whisked egg.  Then add the egg mixture to the stuffing mix.  Again, mix this all very well.  You want the entire dish coated.  If it is not, add more broth by the 1/4 cup.

Place the stuffing into a greased baking dish (casserole dish works well) and bake at 350 for about 50 minutes to an hour.  *Mine baked in 50*

Some of the ingredients in this recipe I kept at the same even though I halved the recipe.  For example, I kept the same amount of spinach because I thought it added more flavor and filled out the stuffing better.  Another example is the chicken broth.  Using the entire cup for half the recipe was perfect.  If you are going to make the recipe whole (not halving it), you should use twice as much broth with the original recipe.

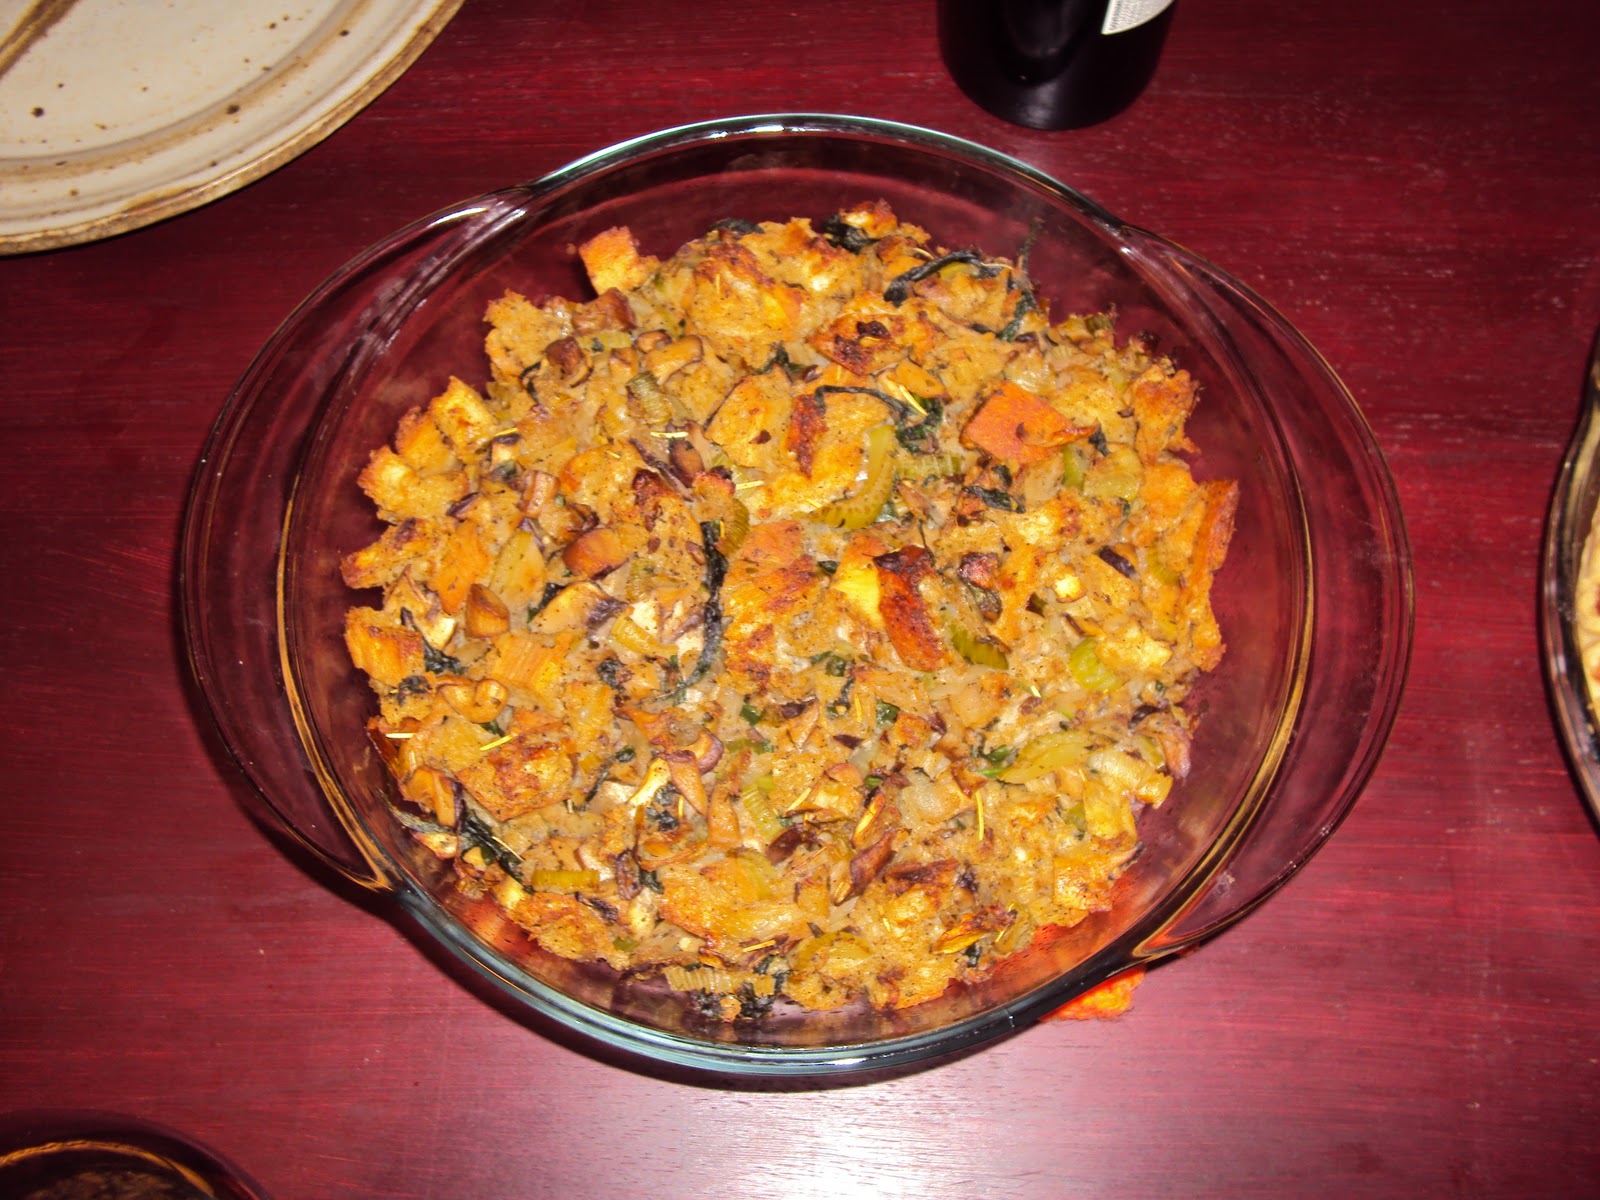
Here is what we got!


Let me know if you decide to make this!  It is so tastey.  Let me know how yours turns out!

Let us talk basic kneeds!